Screws, Pins, Shafts
Individual parts of the construction set are connected either by M4 screws or printed pins. Each option has its advantages and disadvantages. In this guide, we will describe both variants. We will also discuss printed shafts and how they differ from connecting pins.
Screws
Using M4 screws is convenient and functional. We recommend using screws with a cylindrical, hexagonal, or semi-spherical head. Generally, choose a type that does not tend to sink into the construction set.
Since the construction set works with multiples of 8 mm (the basic size of one part), it is necessary to account for the fact that a nut will also need to be screwed onto the screw. A standard M4 nut (DIN 934) has a height of 3.2 mm, so you will likely be working with screws of lengths 20 mm, 30 mm, 35 mm, and 45 mm. More precise lengths would, of course, be slightly shorter, but they are not as easy to find.
Screws should be tightened with care. Plastic is softer and more brittle than metal screws and can easily loosen. The use of washers is at your discretion; they are generally recommended, but they will not prevent screws from loosening, and during active use of the model, screws will need to be tightened from time to time.
When designing the model, it is necessary to consider that a screw has a head on one side and a nut on the other. It is not possible to attach another part directly to a part; one must be skipped. Similarly, tightening and loosening requires some maneuvering space.
We have good experiences with cylindrical heads for Allen keys, which fit easily into the holes in the construction set.
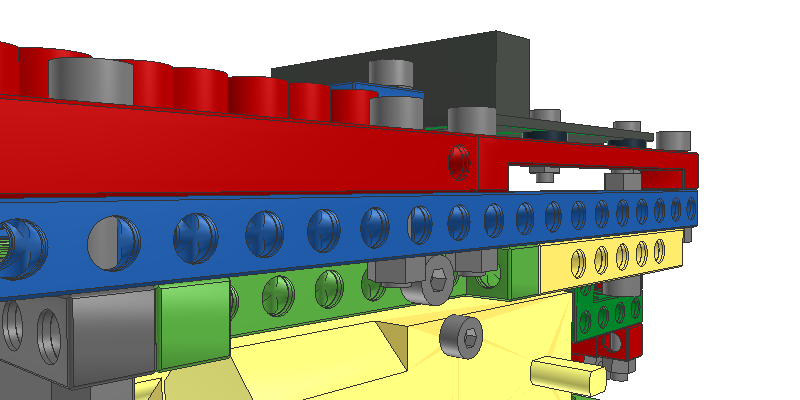
Example connection of BitBeam parts using M4 screws.
Pins
Plastic pins can be used to connect two or more BitBeam parts together, depending on their length. Since the construction set has parts with a thickness of 8 mm and 4 mm (half size), pins are available in sizes 1 (8 mm), 1.5 (12 mm), 2 (16 mm), 2.5 (20 mm), 3 (24 mm), and so on.
The pin has a diameter of 4.6 mm at its narrowest point and 4.9 mm at its widest. This means it will flex in the hole of the construction set.
Plastic pins have a special shape. This is not very readable for their size. However, this detail does not completely disappear during 3D printing. At both ends, the pin has a comparable or slightly larger size than the holes in the construction parts, but they have a forked shape. Pins are printed from PET or PET-G material to make them more flexible. This leads to the pins being somewhat difficult to insert into the holes in the construction set, but they hold well.

Detail of a pin inserted into the BitBeam construction set.
Despite high-quality printing from quality materials, not all holes are the same size, and it often depends on the color of the material. Therefore, it may happen that some pins are occasionally harder to insert and hold better, while others are easier to insert but hold the construction set together less effectively. When designing the model, this must be taken into account, and models should be sufficiently "intertwined" in multiple directions.
For more forceful assistance in inserting pins into the construction set, there is a plastic hammer available in the construction set's assortment that can be used. Even without it, we recommend aligning the pins with something hard and smooth against the construction set. Often, a clicking sound will be heard. This is caused by the pin reaching the correct position. There are small grooves in the construction parts where the pin should ideally fit.
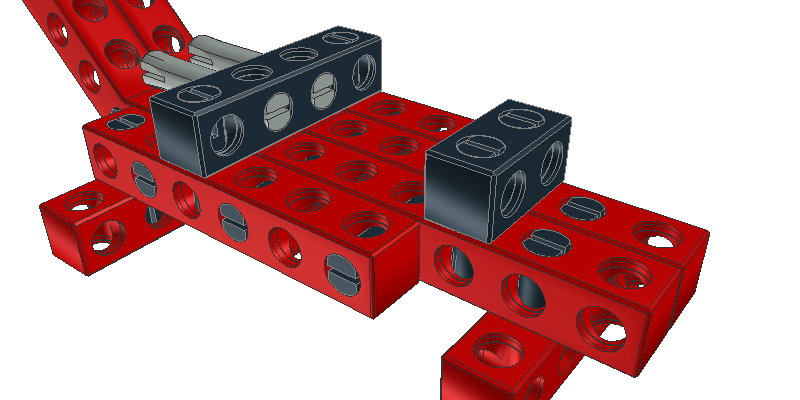
Example connection of BitBeam parts using printed pins.
Shafts
The construction set also includes printed shafts, which are visually similar to connecting pins. However, they have a smaller diameter so that they can move freely within the holes of the construction set. The adapters designed for the shafts have smaller holes than the standard holes in the construction set. Additionally, unlike the holes in regular construction parts, they have flat walls. The shaft should fit into the hole.
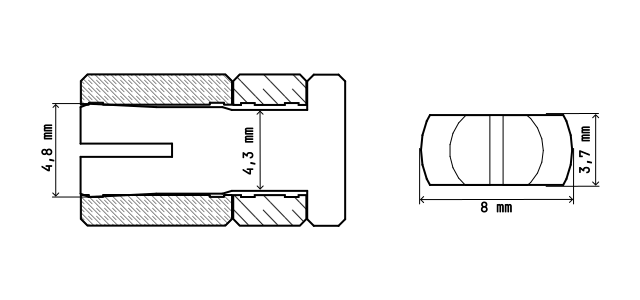
Shaft has a diameter of 4.3 mm at its narrowest point and 4.8 mm at its widest. This means it will flex in the hole of the wheel or adapter of the construction set.
For most common constructions, the printed shaft is sufficiently functional. To facilitate its movement within the holes of the construction set, it can be lubricated with wax. Alternatively, it can be replaced with metal shafts.
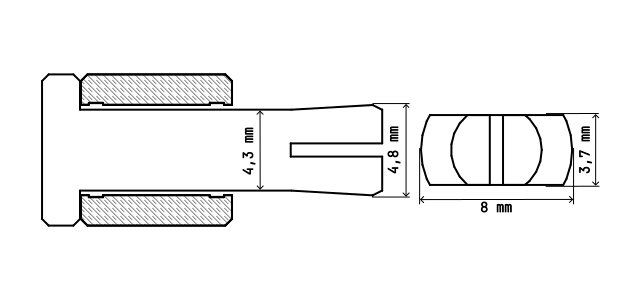
Detail of a printed T-shaft inserted into the BitBeam construction set.
Special Shafts
In addition to regular shafts and pins, there are also special variants or even combinations. These are suitable for specific situations that facilitate model building.
T-Shafts
The T-shaft, as the name suggests, has the shape of a T. At one end, there is a small flat part that prevents the shaft from falling out of the part. This allows shafts with freely moving wheels to be directly connected to the parts of the construction set.
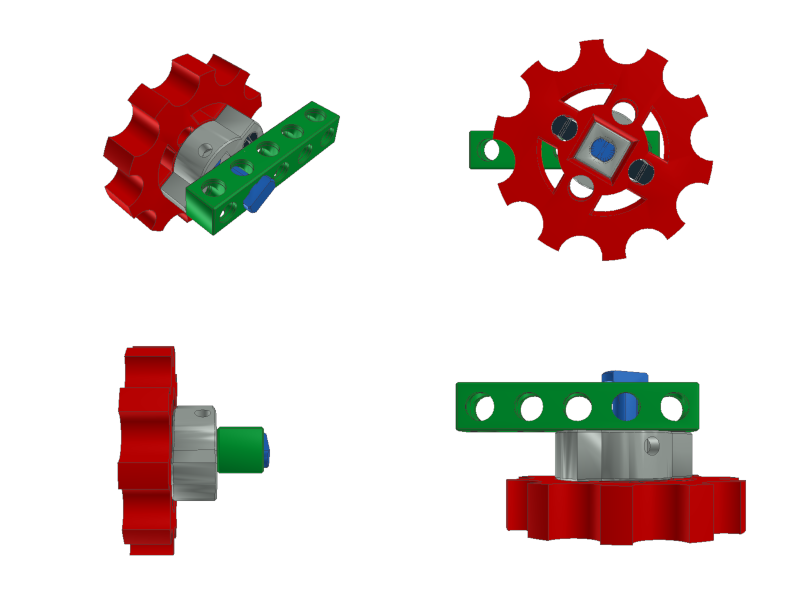
Example of using the T-shaft in the BitBeam construction set.
T-Shaft with Pin
The T-shaft with a pin in one is for situations where the movable part is lightly attached to the construction set with a pin. Therefore, one end is like a T-shaft and the other like a pin. These special shafts are used in accessories, e.g., for model trains.
Detail of a printed T-shaft with a pin inserted into the BitBeam construction set.


