MicroPython on ESP32-S3
The ESP32-S3 Robotic Board can be programmed in several languages, but this guide focuses on Python. We will show you how to bring the board to life, flash MicroPython onto it, and try out the basics of working with hardware.
What is Python
Python is a modern and very popular programming language that has won over the world with its simplicity and readability — code written in it often reads like plain English. MicroPython is a specially adapted, lightweight version optimised to run on small chips such as the ESP32-S3.
The key difference is that while regular Python runs on powerful computers and servers with a vast library ecosystem, MicroPython focuses on efficiently controlling hardware (sensors, motors, displays) directly "on the metal" with limited memory. If you want to learn Python programming from scratch, we recommend exploring the excellent tutorials on Real Python or the interactive materials on FreeCodeCamp, which will guide you through the world of modern development step by step.
Thonny editor
MicroPython must first be flashed onto the ESP32-S3. After that, your computer can connect to the board and upload individual files to the chip without having to reflash the entire firmware each time. Both operations are handled by the Thonny editor.
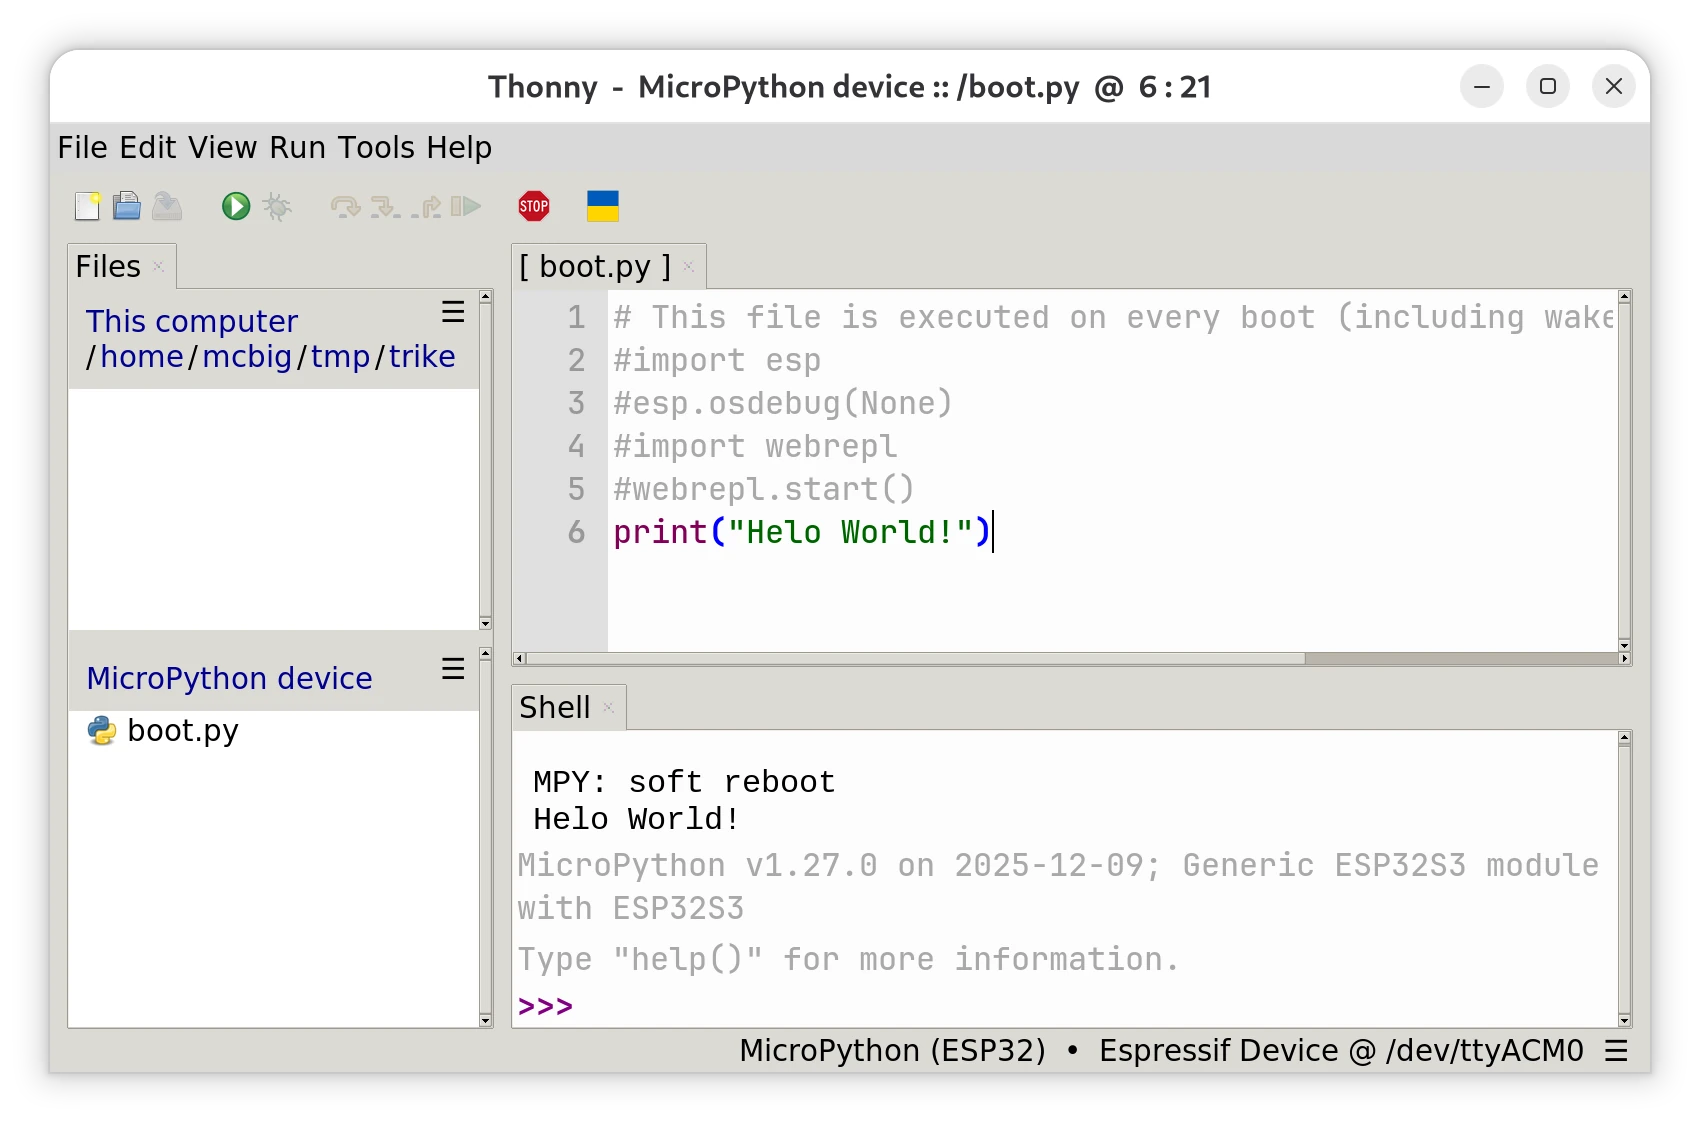
Screenshot of Thonny editor connected to the ESP32-S3 Robotic Board.
Writing code in Thonny IDE is the de-facto standard for MicroPython and an ideal companion for beginners and advanced users alike. The editor was designed with simplicity in mind; it does not overwhelm you with complex menus, but offers what matters most: a code window and an interactive console (Shell) for instant communication with the board. Thonny has built-in support for ESP32, so it can flash the firmware in one click, manage files stored on the board, and debug code in real time. It is essentially a "Swiss Army knife" that connects your computer to OctopusLab hardware without any complicated setup.
Installing MicroPython
The installation dialog is found in the menu: Run → Configure interpreter → Interpreter tab → link Install or Update MicroPython (esptool). If you do not see the Install or Update MicroPython (esptool) link, change the interpreter to MicroPython (ESP32).
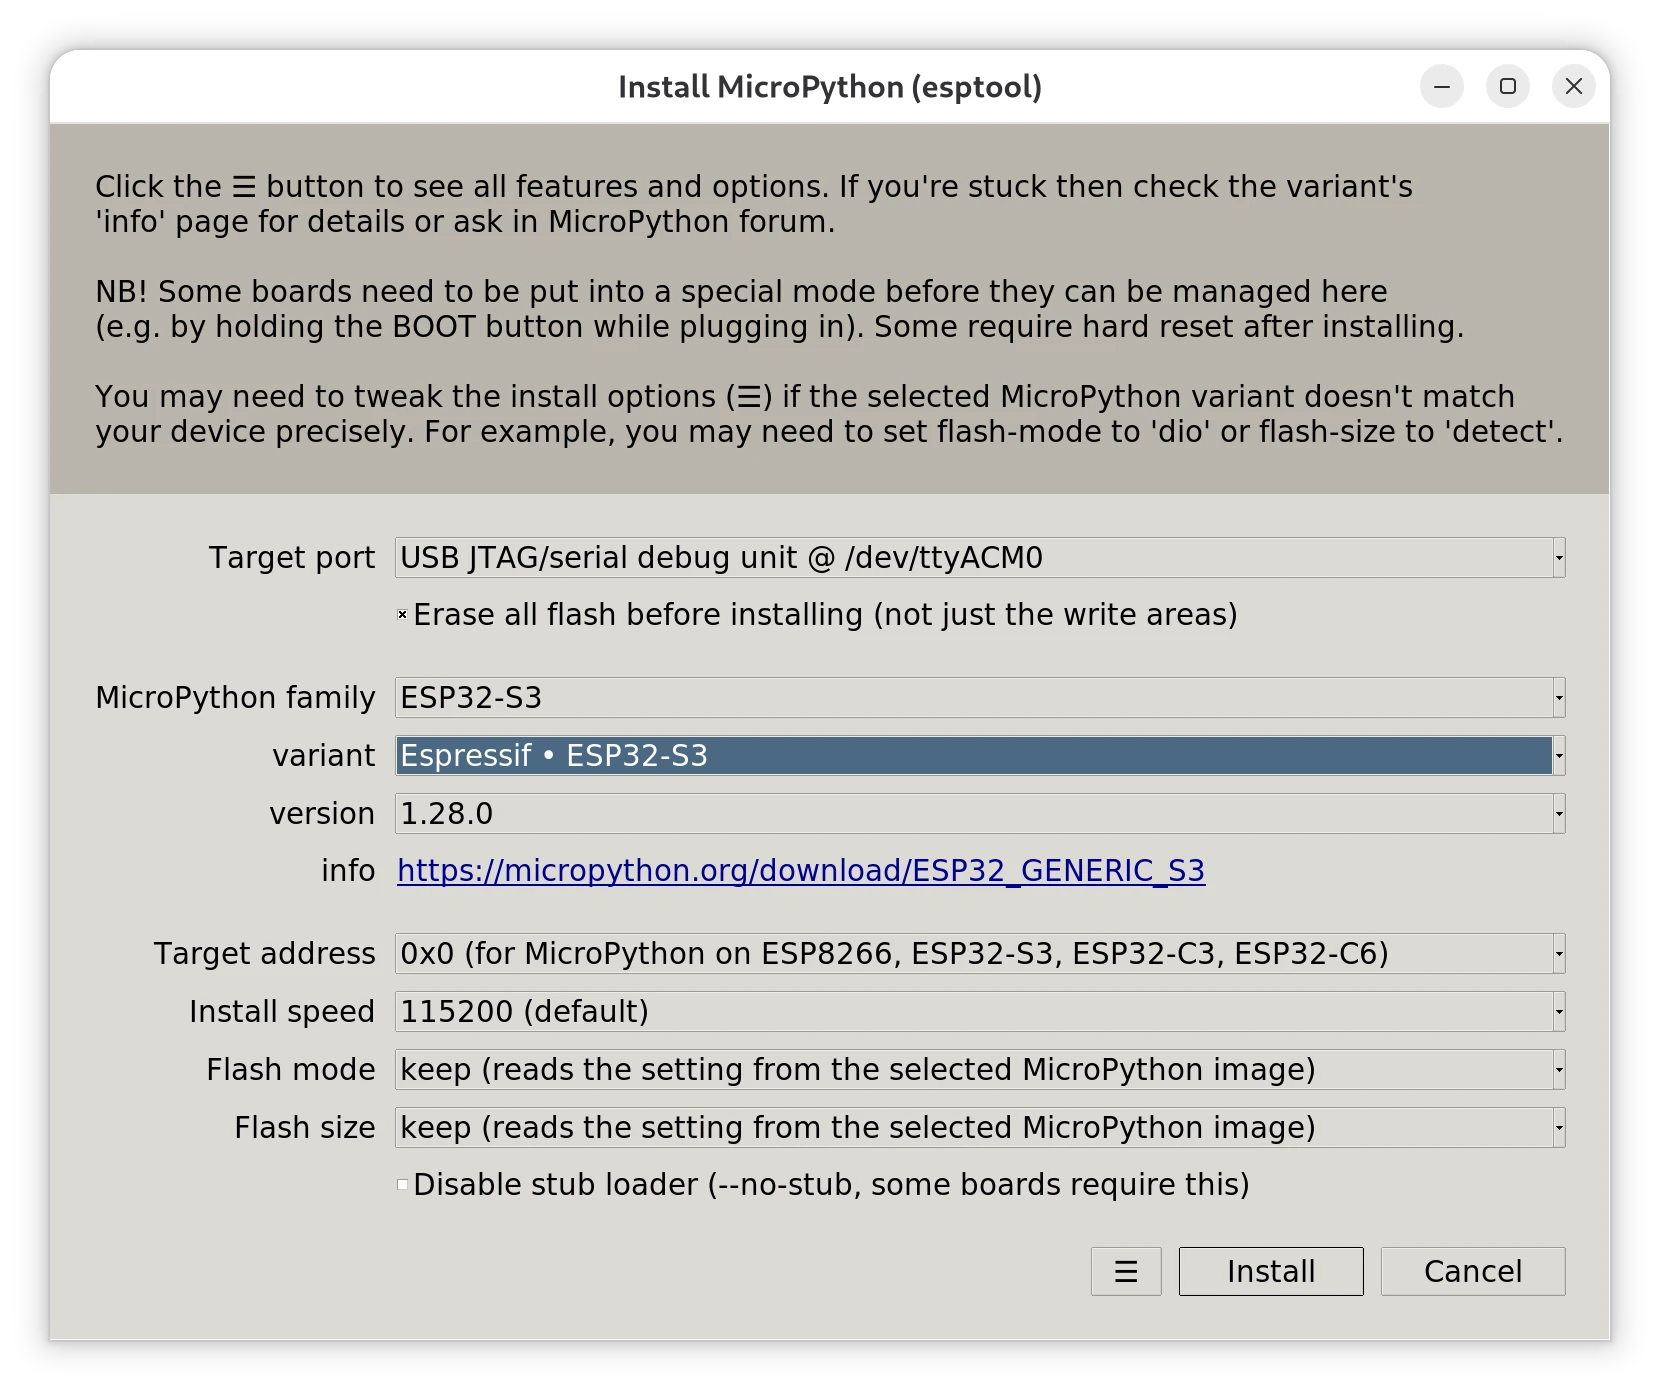
Screenshot of the MicroPython installation dialog for the ESP32-S3 Robotic Board in Thonny editor.
The flashing process can differ slightly depending on your operating system. The recommended settings are:
- MicroPython Family: ESP32-S3
- Variant: Espressif • ESP32-S3
- Version: Set automatically (currently e.g. 1.28.0)
Connection procedure:
- Connect the board to your computer using a quality USB-C cable.
- Switch the power switch on the board to ON.
- Press and hold the Boot button, then briefly press the Reset button.
- Keep holding the Boot button. The correct port USB JTAG/serial debug unit should appear in the Target Port dropdown — see the serial port table below.
- Click Install. We recommend keeping the Boot button held throughout the process until installation completes.
| Operating system | Device for flashing MicroPython | MicroPython console (REPL) |
|---|---|---|
| Linux | USB JTAG/serial debug unit @ /dev/ttyACM0* | Espressif Device @ /dev/ttyACM0* |
| MacOS | Espressif Device @ /dev/cu.usbmodem4101* | USB JTAG/serial debug unit @ /dev/cu.usbmodem4101* |
| Windows | Board CDC @ COM3* | USB JTAG/serial debug unit @ COM4* |
You can now close the installation dialogs, release the Boot button, and press Reset once more.
Warning
Some cables on the market are charge-only and do not have the data lines connected. If the port does not appear, try a different cable.
Your first Python program
After installation, connect to the board by selecting the interpreter in the bottom-right corner of Thonny (or via the menu Run → Configure Interpreter). Choose MicroPython (ESP32) and the correct port.
The Shell tab should display the MicroPython version information followed by the >>> prompt. You can type commands here and they will execute immediately. Try entering: import os; os.uname()
>>> import os; os.uname()
(sysname='esp32', nodename='esp32', release='1.28.0', version='v1.28.0 on 2026-04-06',
 machine='Generic ESP32S3 module with ESP32S3')
After pressing Enter, system information will be printed. In the left panel you will see the file boot.py. If you add print("Hello world!") to it and press F5, the board will greet you. Note that pressing F5 runs the file without saving it. To have the board greet you after every restart, save the file first.
Tip
If you cannot see the Shell tab, you can enable it via the menu View → Shell. The View menu also contains the Files option, which toggles the file browser panel.
Congratulations, you are done!
You have successfully completed the first and most important step: you have brought your robotic board to life and established communication with it. You now know how to flash firmware onto the ESP32-S3, how to use the Thonny editor, and how to run your very first piece of code.
This opens the door to the world of robotics. Your board is ready for its first sensors, LED strips, or motors. There is nothing holding you back now — just write code and watch your robot come to life!