Operation Arrakis: Scout Trike
Strategic Briefing
Our scouts uncovered plans for a light reconnaissance vehicle that performs well both in the deserts of Arrakis and on the carpet in a child's room. BitBeam engineers adapted those plans for earthly conditions, creating a trike that is playful enough for beginning builders and capable enough for its first robotic missions.
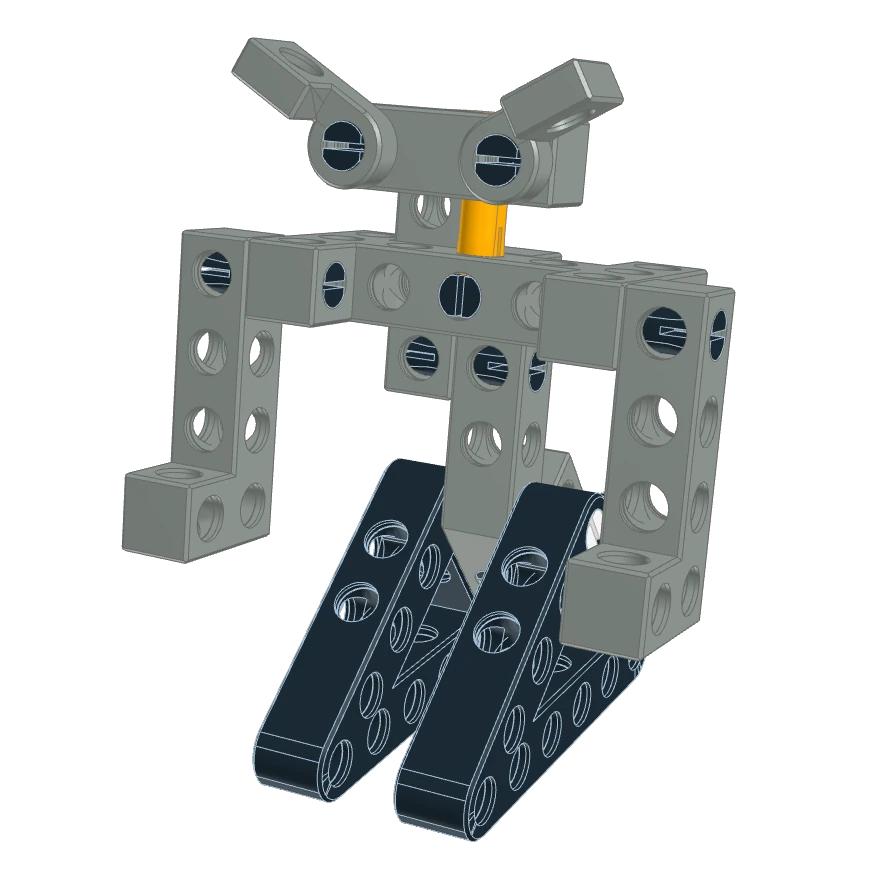
Visualization of the assembled trike with a cylindrical battery mounted at the rear.
Thanks to wide wheels with soft O-rings, this machine has excellent traction even on smooth floors. The design is stable, durable, and ready for remote control as well as autonomous exploration of the unknown territory between the table and the couch.
Choose Your Faction
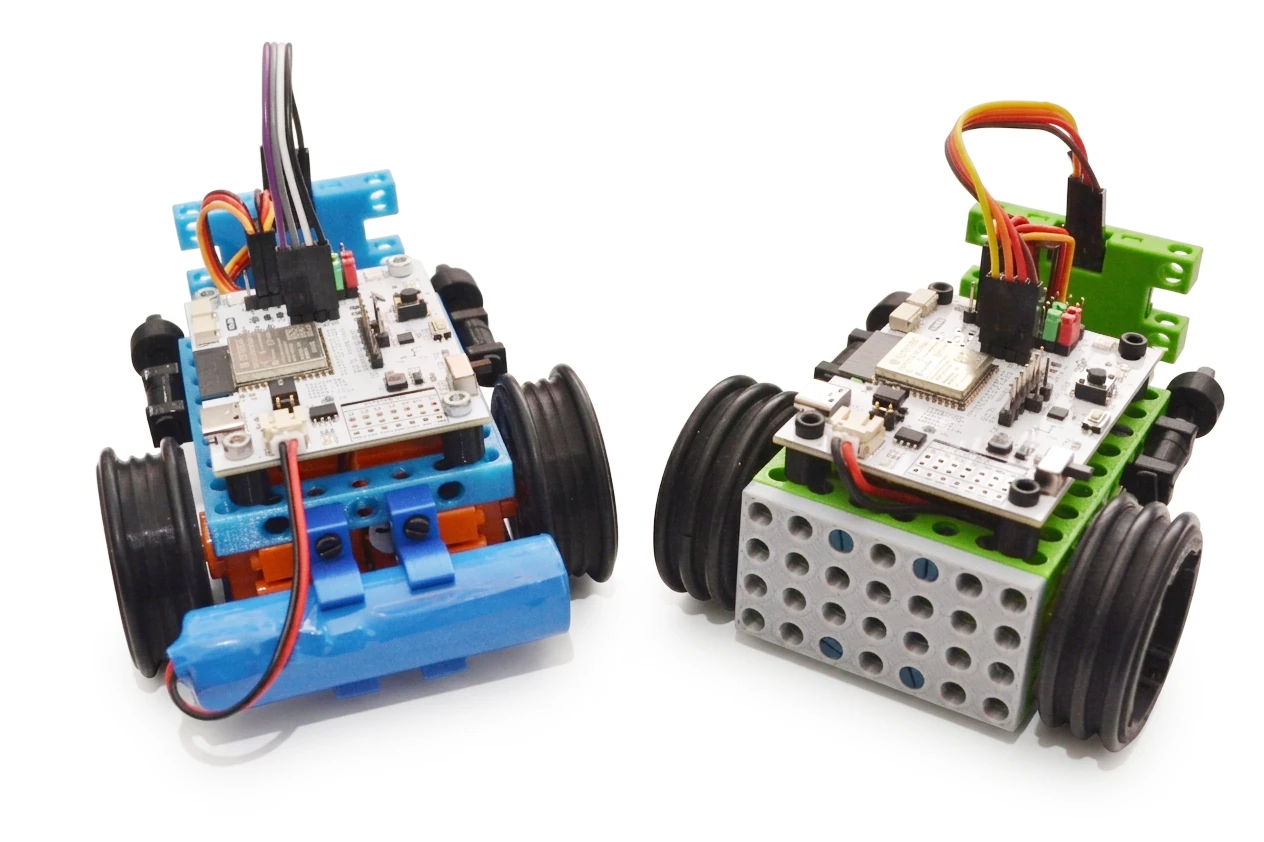
We offer the trike in two variants depending on the battery type:
- Blue Edition (Atreides): an honorable and robust variant for a cylindrical battery, mounted at the rear of the chassis.
- Green Edition (Ordos): a fast and stealthy variant for a flat battery, placed under the main electronics board.
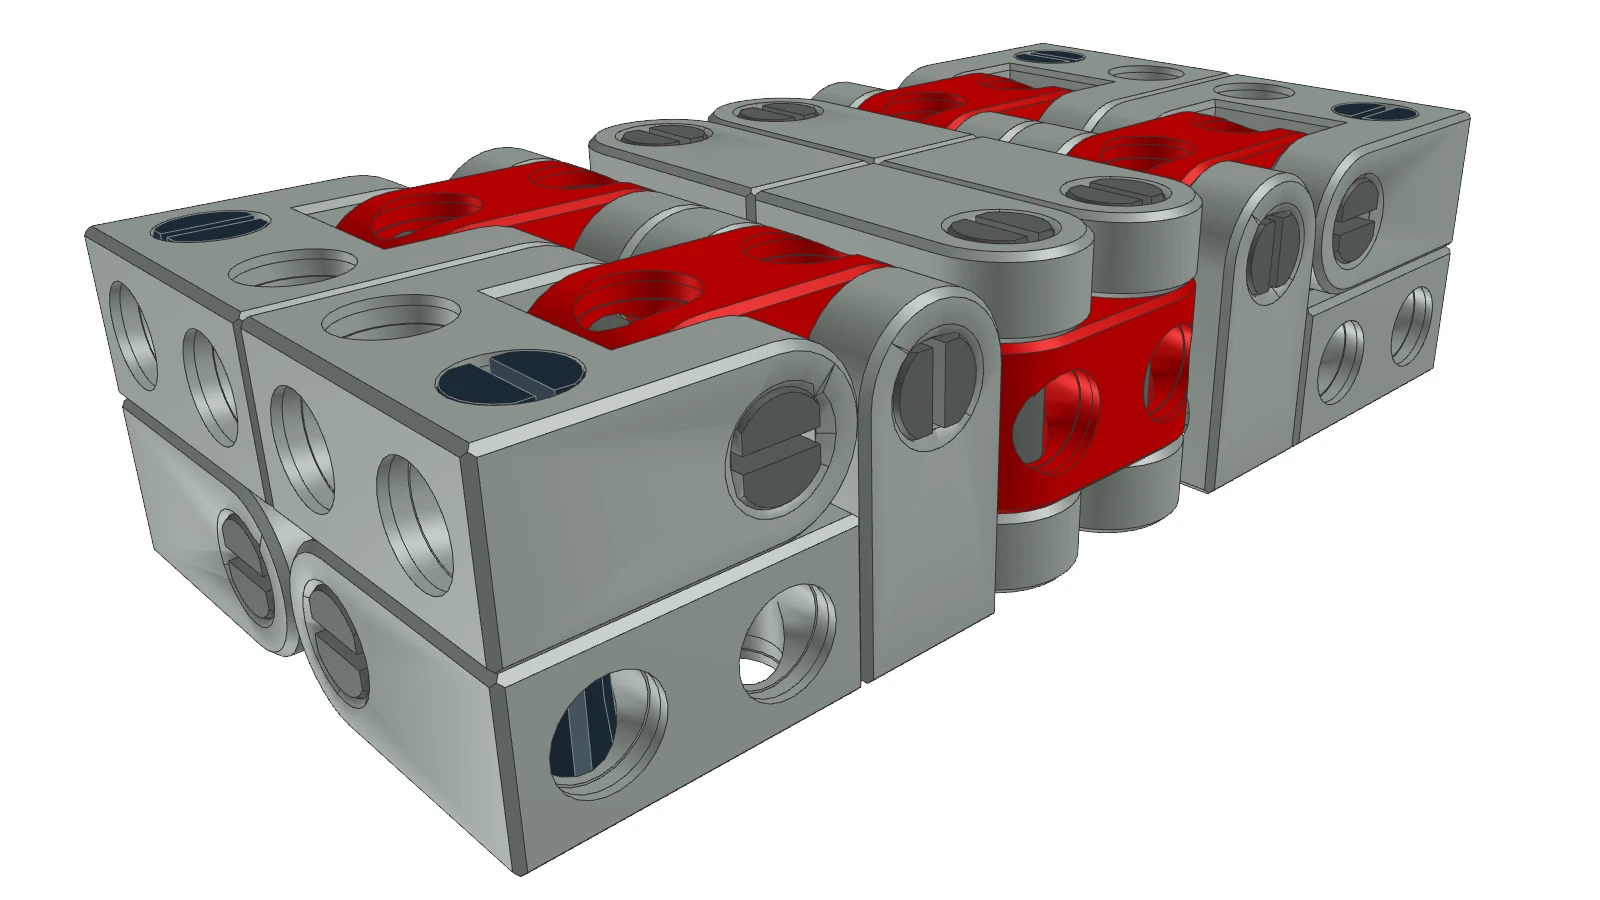
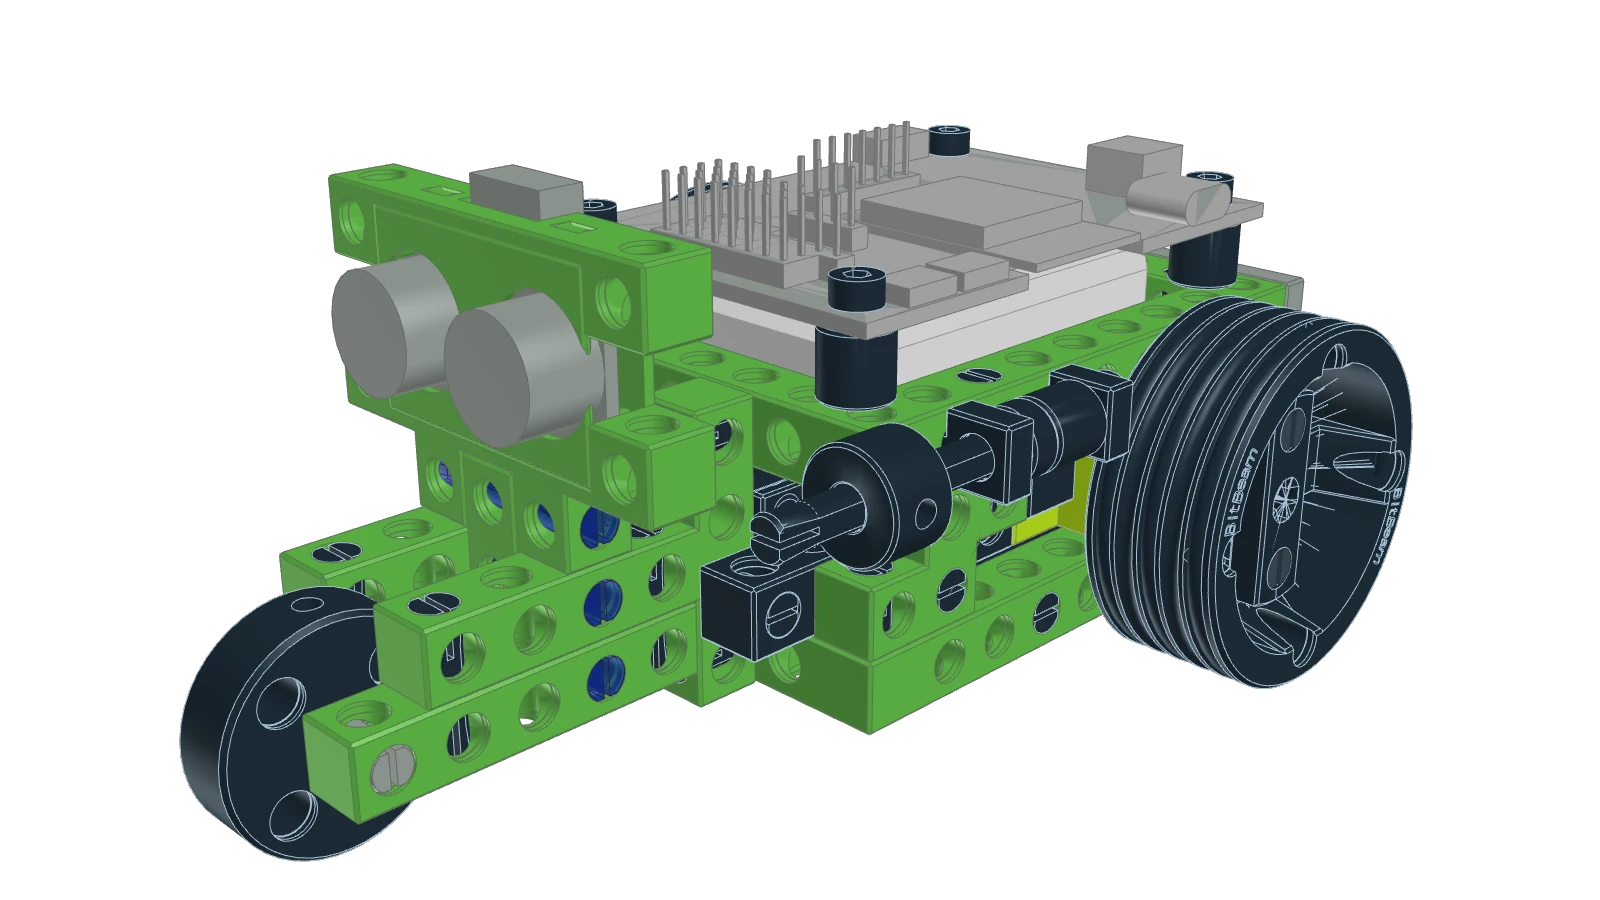
Comparison of both trike variants based on the rear section and battery placement.
Technical Arsenal
Under the hood, you will find equipment worthy of any commander of a home expedition:
- Brain of the operation: the ESP32-S3 Robotic Board from OctopusLab with Wi-Fi and Bluetooth support.
- Propulsion unit: a pair of continuous rotation servos (360°) for the left and right drive wheels.
- Reconnaissance sensor: the RCW-0001 ultrasonic module with a range of up to 450 cm.
- Stabilization system: the integrated accelerometer and gyroscope on the control board.
Tactical Specifications
| Parameter | Specification |
|---|---|
| Length | 134 mm (flat battery) or 154 mm (cylindrical battery) |
| Width | 92 mm |
| Height | approximately 80 mm (depending on cable routing) |
| Wheelbase | 100 mm |
| Weight | approximately 175 g (depending on the battery used) |
| Drive | 2x continuous rotation servo, 360° |
| Drive power | 1.92 W |
| Speed | Approximately 15 cm/s |
| Range | approximately 5 km (depending on terrain and the bravery of the driver) |
| Ultrasonic sensor range | up to 450 cm |
| Lighting | 2x RGB LED + 2x indicator LED |
| Power supply | flat or cylindrical battery depending on the variant |
| Integrated sensors | accelerometer and gyroscope |
| Front equipment | stylized twin machine gun |
Warning from the BitBeam Ministry of Defense
A hit from the twin machine gun may cause serious damage to health or equipment. In extreme cases, it may lead to consequences incompatible with the target's further operation! Exercise caution when testing in residential zones.
Instructions for Assembly Technicians
Assembling the trike does not require an imperial academy degree, but a steady hand and a little patience will help. Pay special attention to the correct placement of the wheels, shafts, and wiring. Moving parts must remain loose enough for both the wheels and the front support wheel to rotate smoothly.
Attention!
The instructions use several types of plastic pins. Black and blue pins are available in lengths 2 and 3, while dark gray pins are available in length 1.5. The dark gray 1.5 pins are used to attach the thin 4x7 plate at the rear of the flat-battery variant and to connect the adapters to the wheels. Before starting assembly, it is worth sorting the individual pin types by length and color.
Instructions for assembling both variants are available in the PDF files:
- trike-green.pdf - green variant with a flat battery
- trike-blue.pdf - blue variant with a cylindrical battery
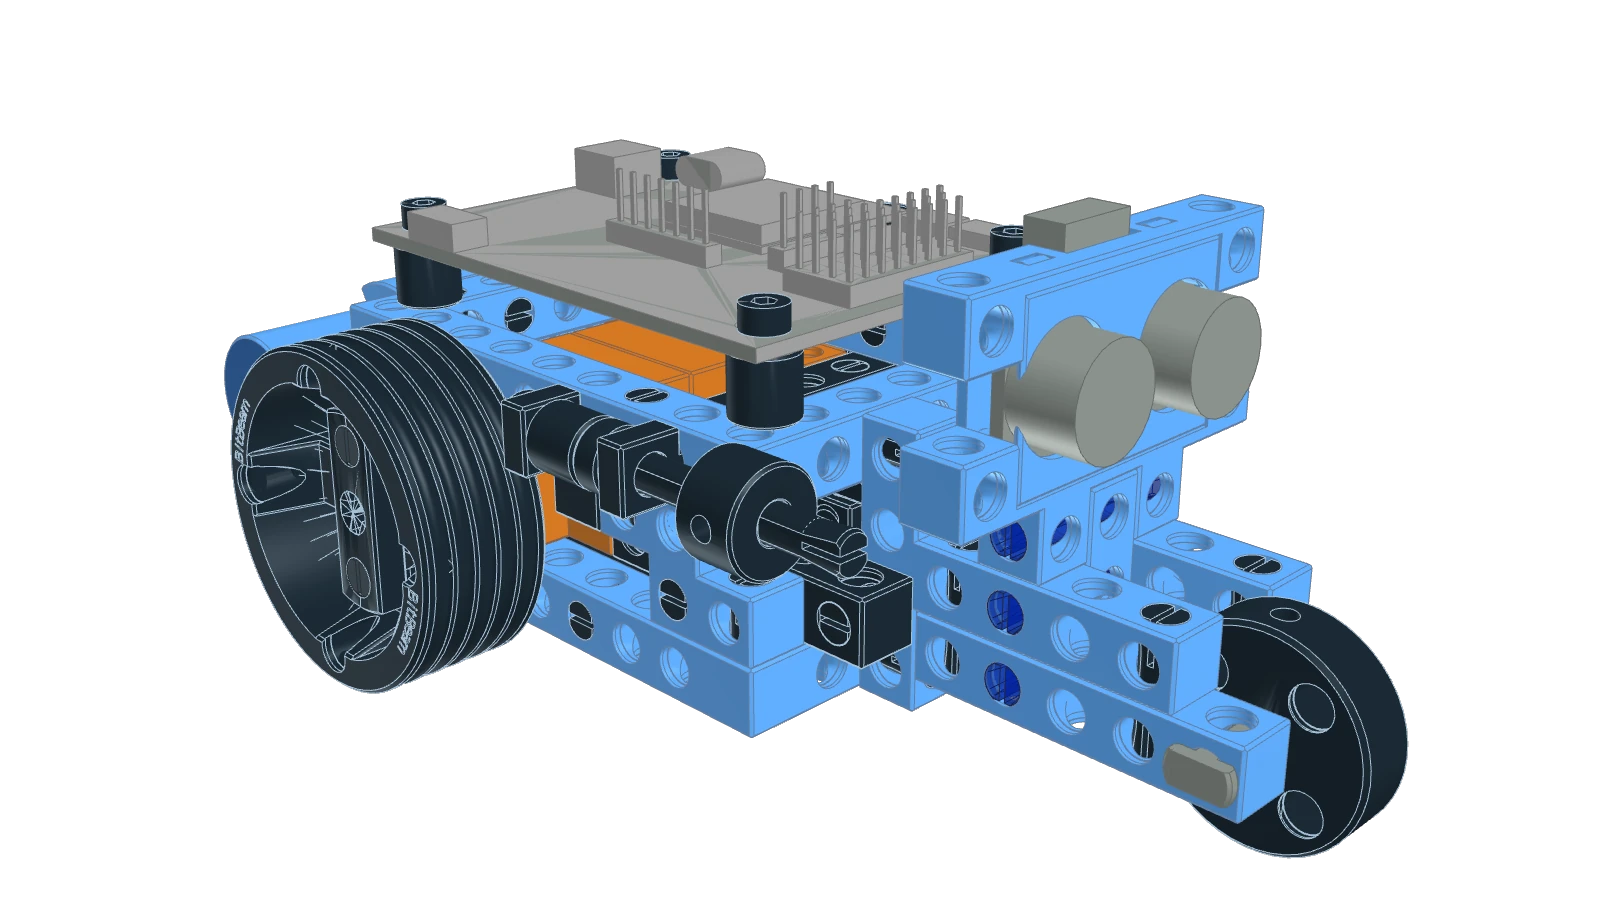
Visualization of the assembled trike with a flat battery placed under the control board.
3D Print Files
If you want to print the parts for your own desert patrol, we have prepared .3mf files with ready-to-print sets. Just import the files into your slicer, for example PrusaSlicer.
- trike-color-pla-sheet.3mf - colored parts for the trike. The sheet also contains holders for the cylindrical battery bb-tube-18x4. If your mission does not require them, you can hide them in the slicer.
- trike-black-pla-sheet.3mf - black parts for the trike. The bb-wh-o-ring-5x2 wheels can be replaced with other similarly sized wheels. This variant uses a rubber O-ring. For rougher terrain, the bb-wh-terrain-5x2 variant may be a better fit.
- trike-black-pet-sheet.3mf - black connecting parts, namely pins and shafts.
- trike-extra-pet-sheet.3mf - additional connecting material. Here you will find shorter pins for connecting adapters to wheels and for attaching the thin 4x7 plate in the flat-battery variant, pins of length 3, and a T-shaft.
- bb-plate-4x7-th - thin 4x7 plate for the flat-battery variant.
Recommendation
The recommended material is included in each file name. PLA can also be replaced with PVB or PETG. However, pay close attention to the small front wheel of the trike, which must rotate easily. If both its supports and the wheel itself are printed from PETG, the motion may be less smooth because of the material's flexibility. On the other hand, PETG is often the better choice for the 5x2 wheels in the off-road variant.
Where to Get the Trike?
You can purchase the trike in two variants in our e-shop:
- BitBeam Trike Kit – complete kit including all printed parts, electronics, and connecting hardware.
- Robotic Kit – electronics and connecting hardware only; print the parts yourself in the recommended colors or according to your own preferences.
Community and Support
We believe the best way to learn is by sharing experience. If you have any questions about assembling the trike, programming, or are unsure about any technical details in the documentation, do not hesitate to ask.
Our official discussion forum is the primary platform for:
- Technical support: Get answers to questions about hardware and code.
- Discussion: Share your projects, ideas, and tips for working with the kit.
- Feedback: Help us improve the trike and documentation.
Join our community and develop your skills alongside other makers.
Disclaimer
We disclaim responsibility for any damages incurred during assembly or operation of the trike. The behavior of the machine during the mission is the responsibility of the assembly technician, the programmer, and the commander of the crew.